Windows Printer Setup by IP Address
How to setup a Windows computer to print via IP address
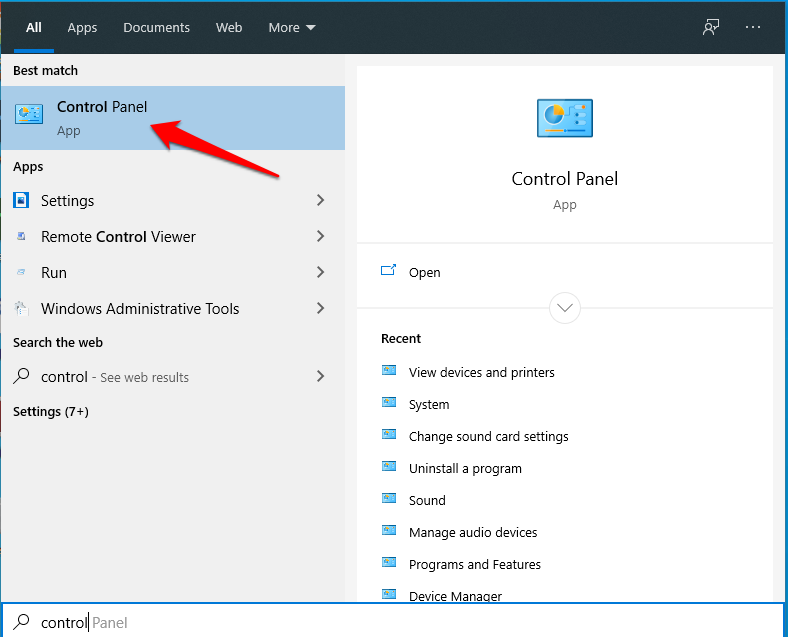
Start by Clicking Start and typing 'Control' then clicking 'Control Panel'
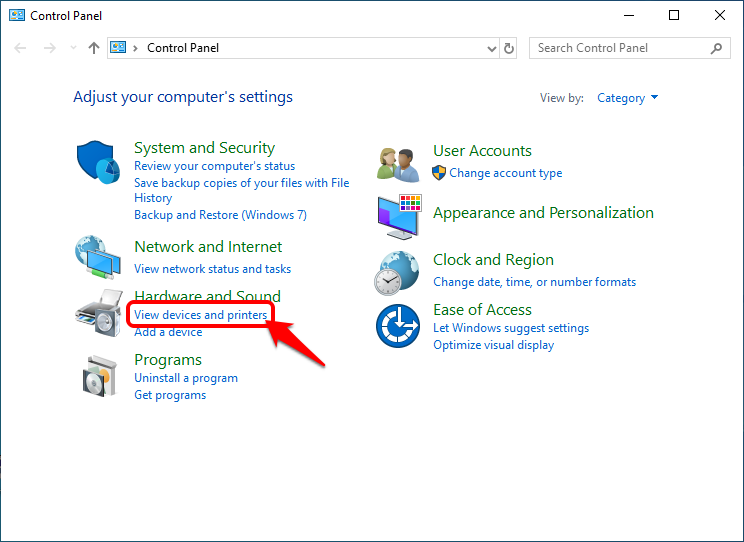
Now click "View devices and printers"
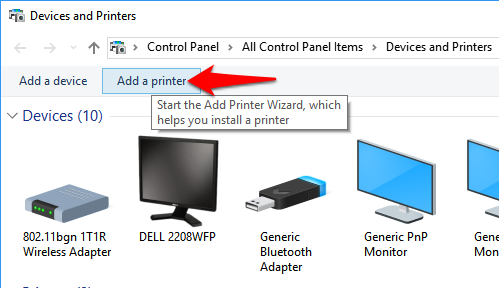
Next click "Add a Printer"
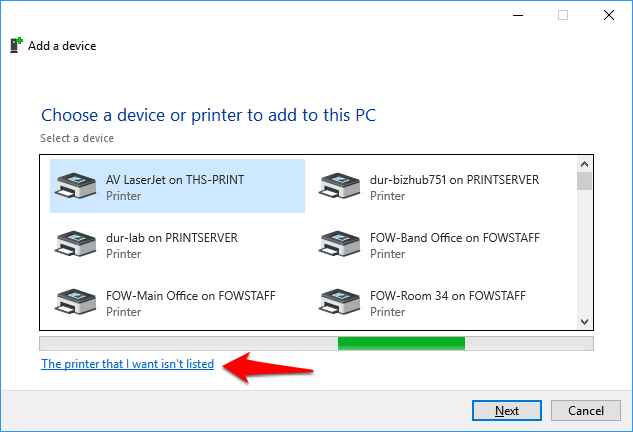
Next you will want to click the link below the window that comes up. That window will attempt to find your printer but clicking the link is the best way to go even if it is listed...Do NOT wait for the window to stop spinning (searching). Click the link immediately.
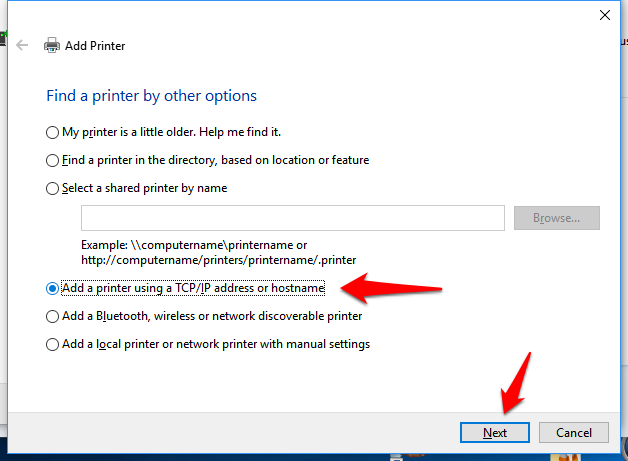
Next you should choose "Add a printer using a TCP/IP address or hostname" then click next as seen below.
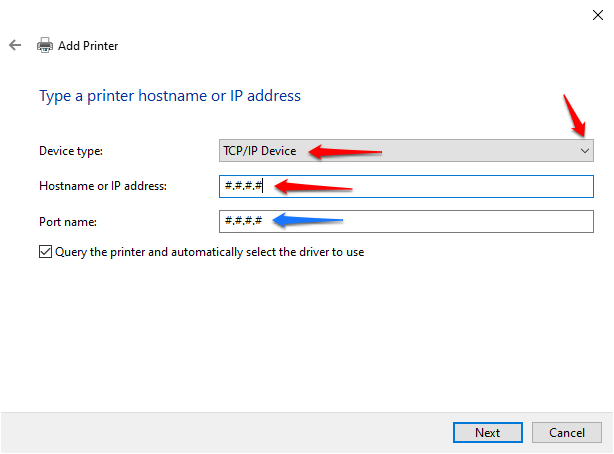
Set the 'Device Type' to 'TCP/IP Device' Enter the IP address for your printer as seen below. You can get the IP address either from the printer display or from IT. The blue arrow is for the port. It will automatically get entered to match the IP address you enter. Leave it that way.
After clicking Next as seen in picture above, the printer will be detected and you will be asked to give it a name. The printer may be configured by IT to have a default name. If you don't like it, change it. The name you put in only affects you! A common format we use is SCH-printername where SCH is the 3 letter code for your school and printername is usually the room the printer is in. An example for me would be 'ths-mainoffice'. See screen below:
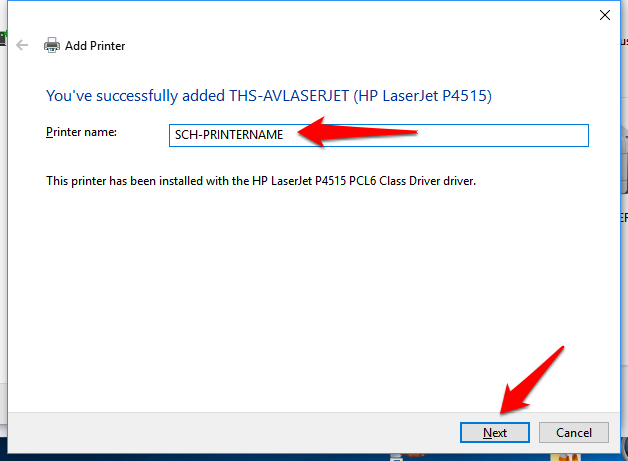
Clicking Next above will finish the install process!
If you run into issues with this process, please submit a tech request.